Toyotec Rocky the Movie Pachinko
Repairs, Restorations, Tweaks and Insights
Introduction
Original 8/1/2015 Updated 8/4/2015
I'm a pinball and video game guy. Although I had seen pictures and read about pachinko machines, and their popularity in Japan, I had never seen or played one. All I knew was that pachinko was vaguely like a very simple pinball machine (with lots of little balls). When a local guy put a Toyotec Rocky the Movie pachinko up for sale, I thought this would be a great time to learn about pachinko machines, this popular Japanese pastime, and add one to my gameroom.
By the way, I've learned a lot from the nice people over at PachiTalk.com. If you are interested in pachinko, head over there. Thanks guys.
Overview of Rocky Pachinko
Original 8/4/2015 Updated 8/5/2015
The ultimate goal of Rocky is to end up with more balls than you had at start. You shoot balls, at a speed you control, onto the playfield. The balls bounce around on the brass nails, potentially passing though targets and other items to ultimately either drain or rewarding additional balls.
The Rocky pachinko machine can broken down into the following key functions
- Launcher
- Playyfield
- LCD Display
- Switches
- Lights
- Sounds
Launcher
The launcher is located on the bottom right of the Rocky cabinet. It protrudes from the cabinet and has a knob on the end. This knob can turns clockwise and, once turned, Rocky will start launching balls onto the playfield. The further the knob is turned clockwise, the stronger the balls will be launched. As long as the knob is turned from its starting position, the game will continue to launch balls every half second or so.
The launcher knob has a button at its 9 o'clock position. When this button is pressed, Rocky will not launch any balls. The player can use this to fine tune the knob position by shooting only 1 or 2 balls.
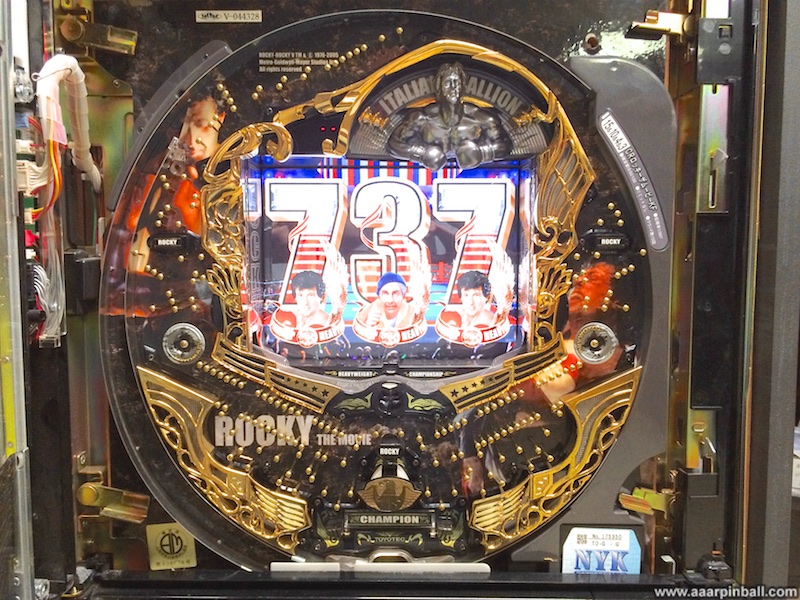
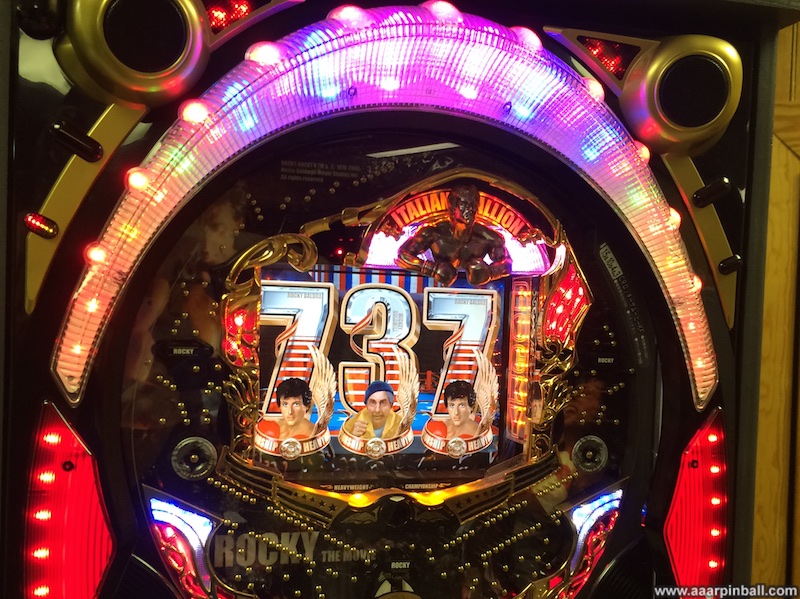
Playfield
Rocky's playfield is mounted vertically inside the pachinko cabinet. This allows the balls to be launched toward the top of the playfield and make their way downward because of gravity. The playfield is circular with a significant portion of the middle area taken up by a high quality LCD display. The playfield contains numerous objects:
- Lots of brass pins to obstruct the ball
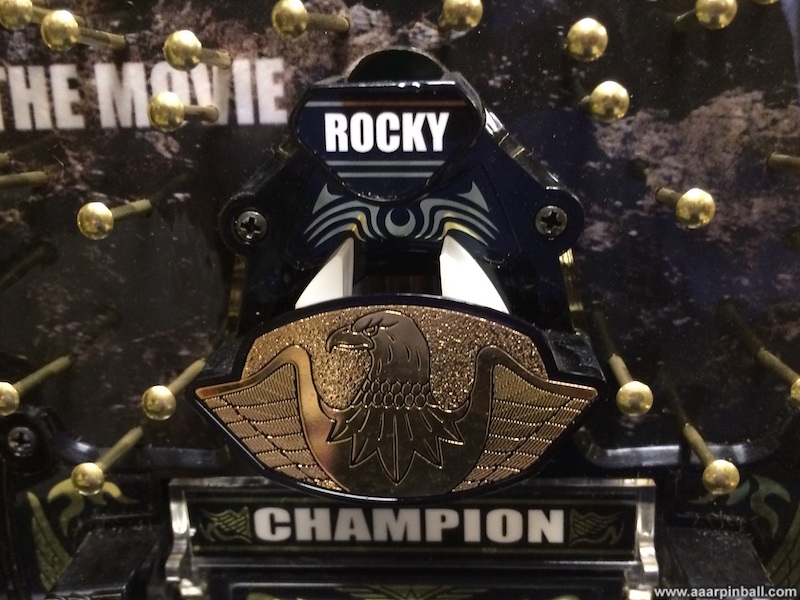
- 3 Rocky targets
- 2 Spinners
- A "Heavyweight Championship" target
- A set of "Wings"
- A Champion door that opens
- 4 Award Drains
- Classic Drain
The playfield is shown below. I've increased the shadow detail to help show the playfield since it uses a lot of dark colors. I also opened up the glass door to get a better picture.
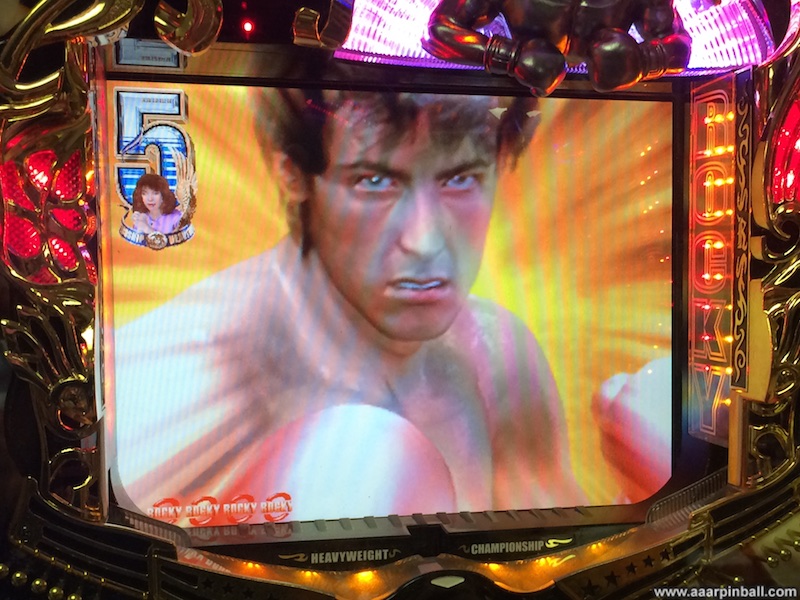
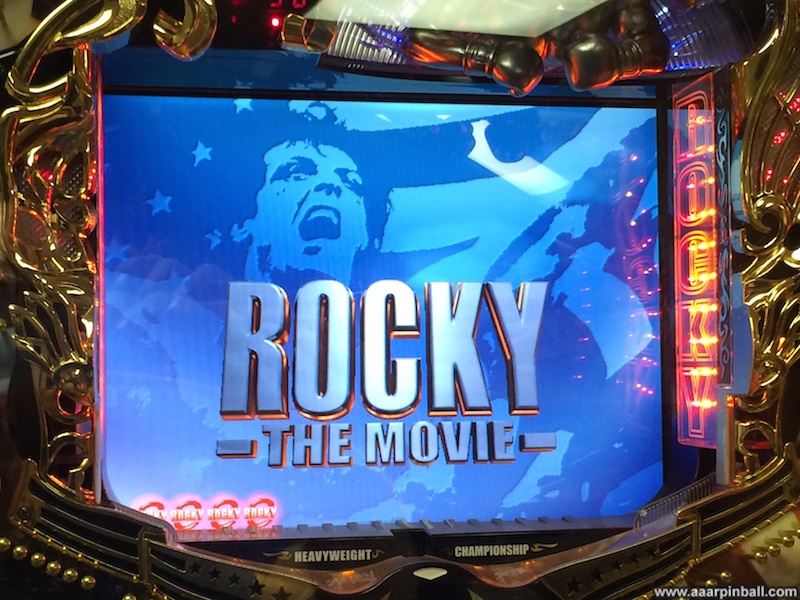
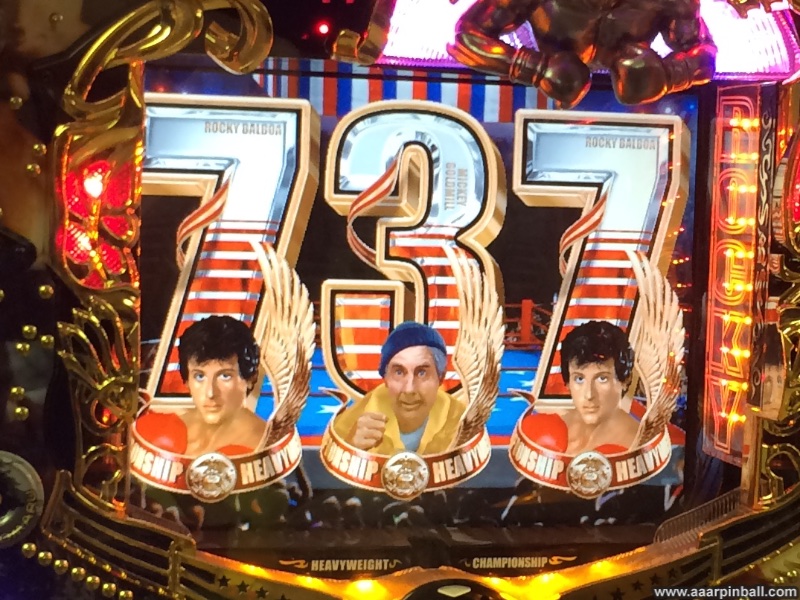
LCD Display
The LCD display in Rock Pachinko is implemented very well. It displays a wide variety of items including movie clips, slot machine reels, mini-games, and general animations. The quality is very high and the colors are vibrant.
Some LCD images are shown below.
Switches
Coming from a pinball background, pachinko machines have very few switches. I use the term "switch" loosely to indicate some mechanism that detects when a ball passes through.
Rocky pachinko has the following switches
- Switch for main drain detection
- Switch for leftmost bottom award drain
- Switch for the center-left bottom award drain
- Switch for the center-right bottom award drain
- Switch for the rightmost bottom award drain
- Switch for the left side Rocky target
- A few switches used for internal ball feeding mechanisms
Note that the right Rocky target is decorative only and isn't a real switch.
Lights
Rocky had a significant amount of computer controlled lighting. The lights are multi-colored and light up in various patterns at various times during gameplay. The lights are all over the cabinet and shown below, although this picture hardly does the lighting effects any justice.
Sounds
Rocky pachinko plays no sounds at all until an event is triggered. But when an event is trigger, Rocky is very loud.
The sound is generated from 3 speakers. Two speakers are on the top of the cabinet (left and right) and one is down by the ball award container.
Pachinko games generally provide 3 volume settings: off, darn loud, and even louder. Rocky is no different.
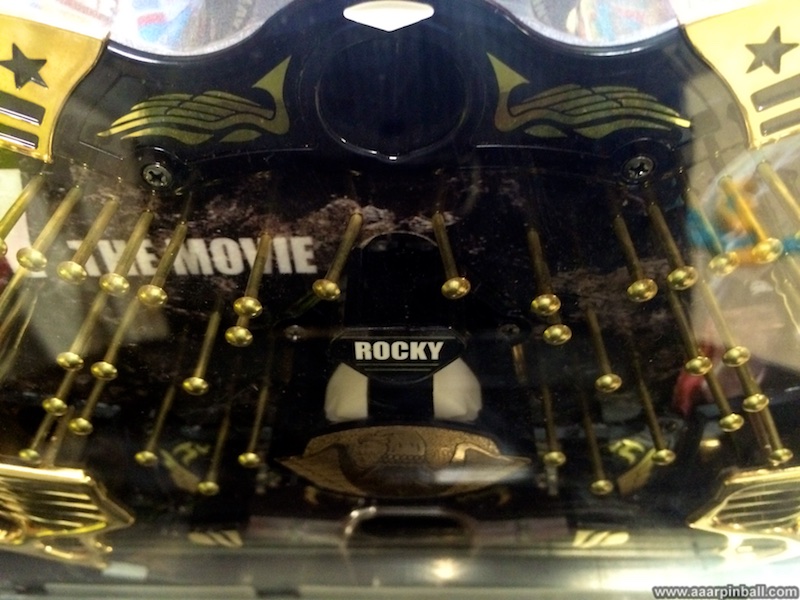
Rocky Targets
Original 8/3/2015 Update 8/4/2015
When I got my Rocky pachinko, I couldn't tell how to top two Rocky targets impacted gameplay. While I had read that they trigger the "Wings", I was unable to correlate any behavior.
I was worried the targets were broken so I decided to remove them from the playfield. This immediately showed me something that was surprising (to me). The right most Rocky target is purely decorative while the left most Rocky target is an actual switch. The decorative target (right most) is shown below followed by the active target (left most).
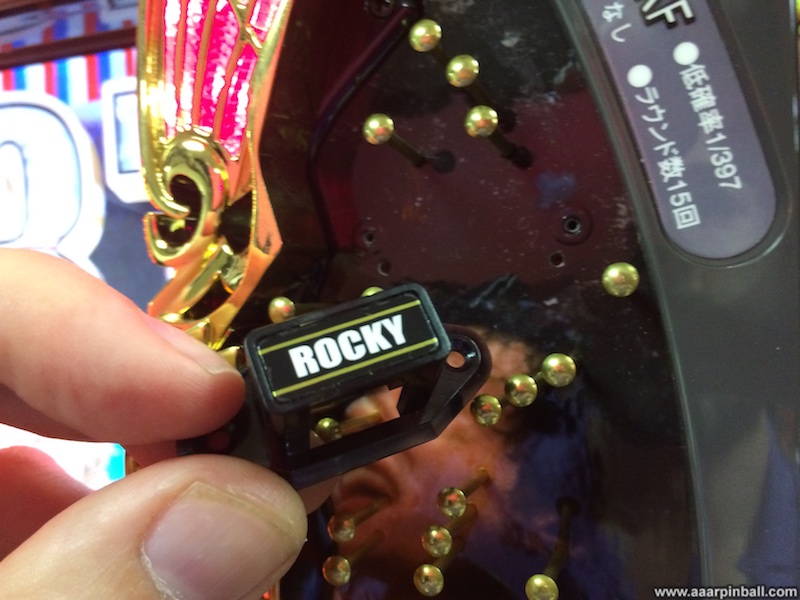
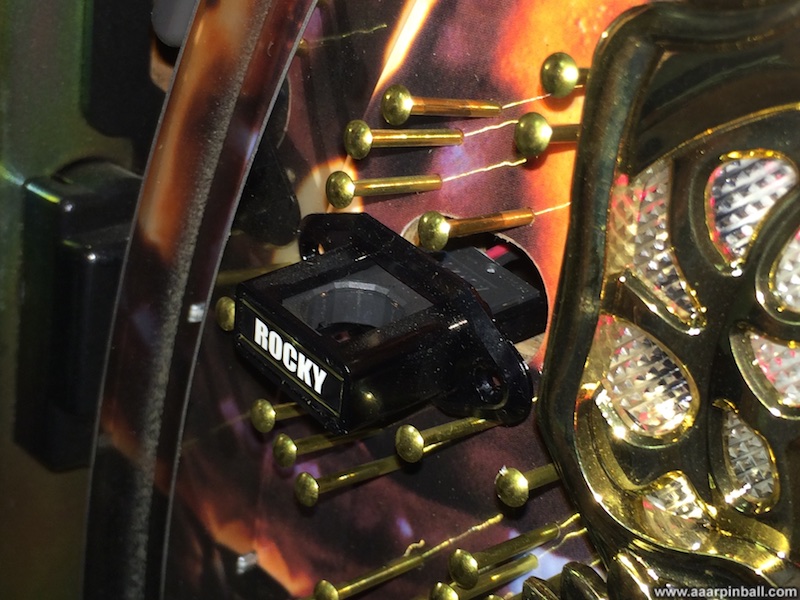
Knowing that I could ignore the right target, I started looking at the impact of the left target. I still couldn't associate behavior with having a ball roll though this target. The nice people over at Pachitalk.com mentioned a common pachinko feature called "sub-roulette" that often gets triggered when one of these targets is activated. It was indicated that when the ball rolls through the target, often a single LED indicator will light up. My Rocky pachinko does have an multi-segment LED indicator on the front that also has some individual dots. With this in mind, I was able to correlate rolling the ball though the target and one of the dots lighting up. I was happy because this showed the switch was working. I only had to figure out exactly what was happening.
I noticed that rolling the ball through the target would change the LED that was illuminated (or cause an LED to flash). I would later realize these different indicators allow you to know how many times the left Rocky target has been activated.
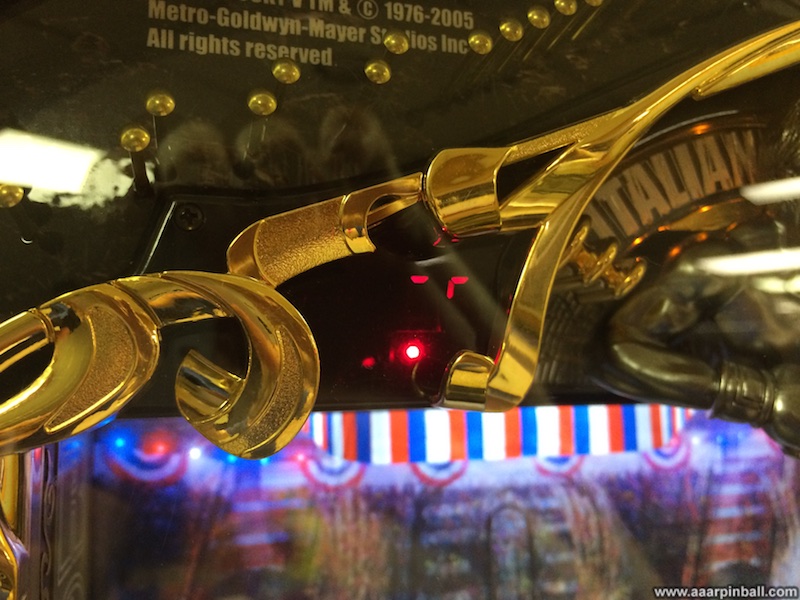
The most surprising result, however, was when I discovered the target's behavior. When you activate the left Rocky target, a 40 second timer starts. After the 40 seconds, the "wings" at the bottom of the playfield open for a very short amount of time (300ms?). If you have activated the target multiple times, another 40 second timer will start and the "wings" will open again.
The wings are shown below. Above the wings is the bottom Rocky target and below the wings is a Champion door.
From a pinball background, I was not expecting a target to have a resulting impact 40 seconds later!
Note: I'm still investing this but it appears the "wings" may not open each time the 40 seconds passes. It seems to be highly likely, but I may have seen a couple of situations where they didn't open.
I'm still figuring out how this works. The above (40 second) explanation seems accurate when you are playing the part of the game where Rocky is boxing. However, when you get to the part that says "Mickey's Chance", the "wings" open a lot more frequently.
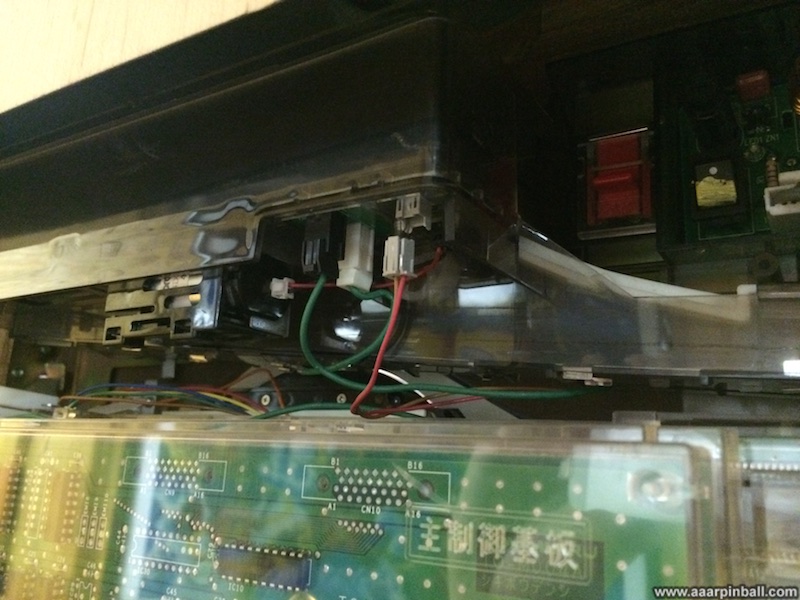
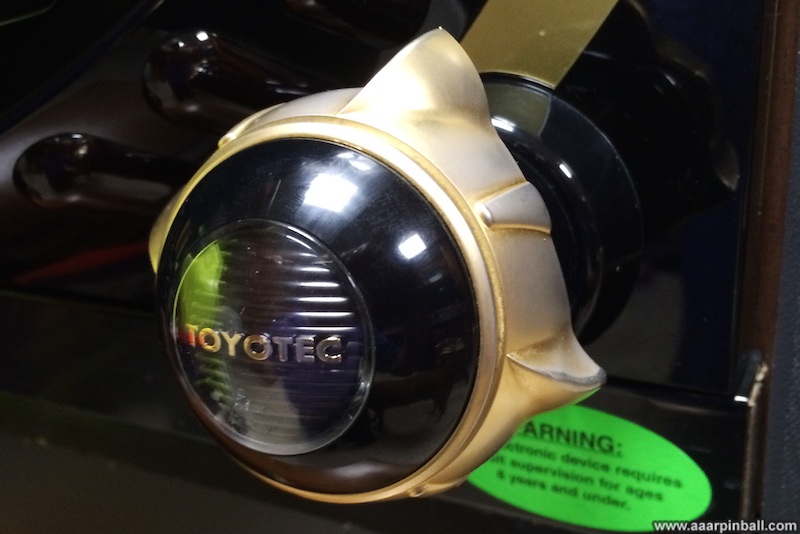
What is this Thing?!
Original 8/3/2015 Updated 8/4/2015
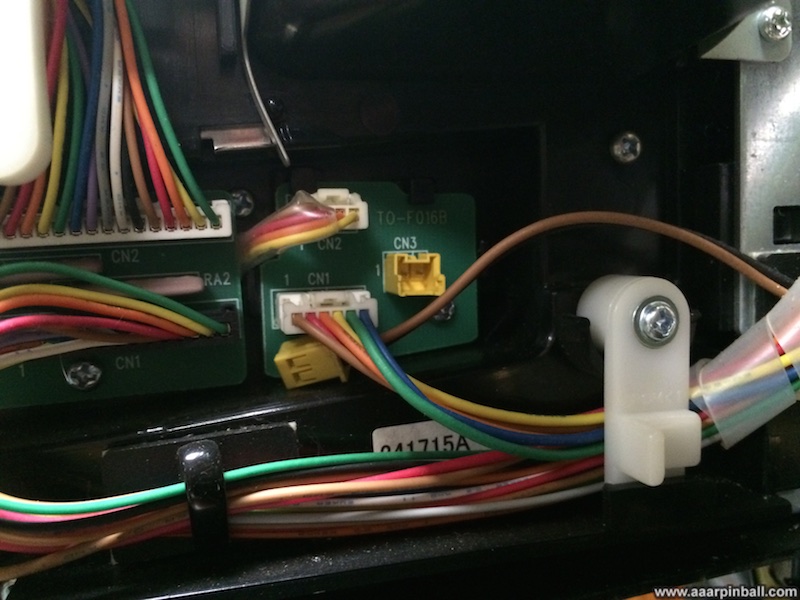
I was poking around the back of the Rocky pachinko machine and noticed this strange device:

It's a DB25 connector with a diode, capacitor and resistor. It looked like a half-wave rectifier (to convert AC to DC), but why was it there?
I learned that pachinko machines don't operate at all outside of the pachinko parlors unless they have a card reader connected. This is an external part that all pachinko parlors have. The card reader connects to this DB25 connector. To get around this, a "dongle" has been created that does just enough to enable the pachinko machine. However, this basic dongle does not enable the front panel buttons and does not operate and the LED display (it will always be blank).
The picture below shows the front panel. The "Push!!" button is functional, but the smaller white buttons on the left and right of the (blank) display are not operational.
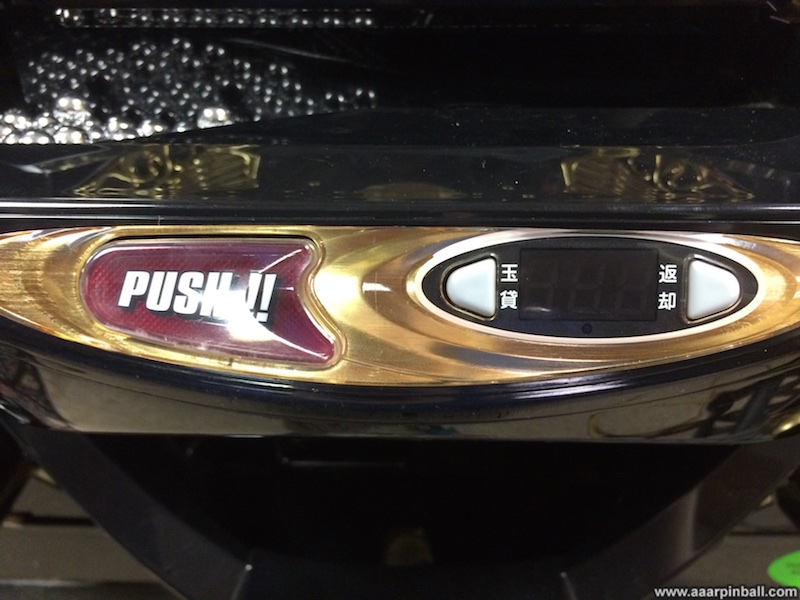
A guy named Dave has created "Dave's Dongle" which has a micro-controller and enables more functionality (LED works, buttons work, and more). It is more formally known as a "Card Reader Emulator". I haven't purchased it yet, but information about "Dave's Dongle" (CRE) can be found on Dave's website here.
Two of my Speakers were Disconnected!
Original 8/3/2015 Updated 8/4/2015
When I got my Rocky pachinko, the seller mentioned that another pachinko he had was much louder. This didn't mean that Rocky was quiet. No way! Rocky was still pretty loud. A little while after getting Rocky home, I noticed that audio was only coming from the top left speaker. The top right speaker was silent. I thought to myself that this might explain why the seller thought it wasn't as loud as his other pachinko.
I opened the front door and looked at the location of the right speaker. A wire was disconnected! Luckily the connection used a simple spade connector, so I was easily able to re-connect it. The disconnected wire is shown below.

With both upper speakers working, Rocky was even louder.
While poking around Rocky, I noticed there was yet another speaker down by the payout container. This speaker wasn't playing any audio either. Was it also disconnected? To investigate this one, I needed to open up the front door and then locate a button which allows the front bottom portion to open. This showed the speaker (pictured below)
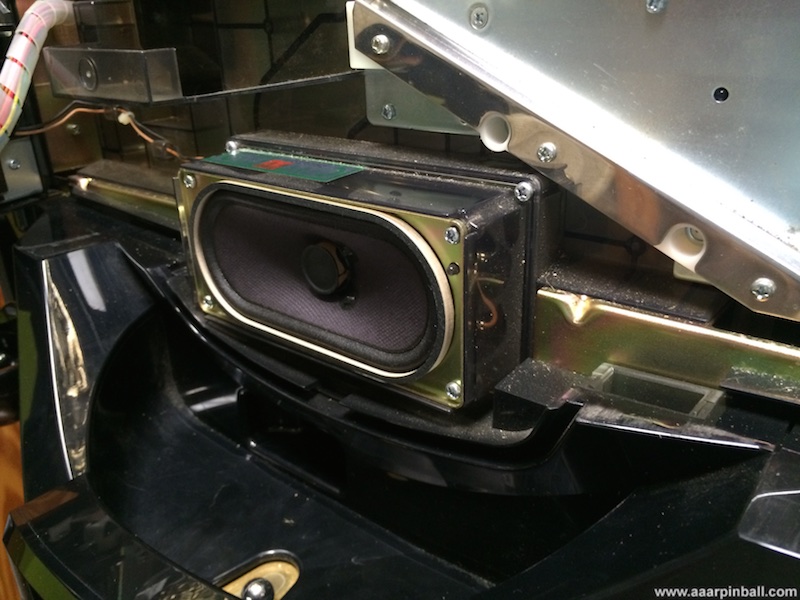
I traced the speaker wire back to a connector on the inside of the front-bottom portion and found it was disconnected. While not a spade connector, it was a typically small connector that could easily be reseated.
Now all 3 speakers are working an Rocky sounds even better. The top left and right speakers definitely play different parts of the music while the bottom provides some addition oomph. However, it is super loud.
Lowing the Volume of Rocky Pachinko
Original 8/4/2015 Updated 8/9/2015
Much like my Yajikita pachislo, Rocky is super loud. There is a volume control with 3 settings, but one is off and the other two are much too loud. This volume control is on the back and pictured below. The switch is the colored switch in the (mostly) middle of the picture.
Again, just like Yajikita pachislo, Rocky pachinko needs resistance added to the speakers in order to lower the volume. This unfortunate hack is required because the master volume is so inflexible. By adding resistance to each speaker, the volume is reduced.
I purchased some potentiometers mounted on little PCBs from eBay. A potentiometer is a device that changes resistance based on how far the knob is turned. Since I didn't know what amount of resistance would result is a reasonable volume, using a potentiometer offered a good solution and flexibility. I don't plan on adjusting these once they are dialed in appropriately. These potentiometers were recommended since they are "easy" to install since they come on a little PCB, allowing the potentiometer be soldered without much hassle.
I do have one complaint about these potentiometers. The max resistance rating is too high. They operate between 0 Ohms and 500 Ohms. After installing I learned that using 15 to 20 Ohms of resistance is the right amount. Because these potentiometers have such a large range, dialing in to 15 or 20 Ohms takes a some effort and the potentiometer is a little fussy. By fussy I mean that the slightest turn causes a jump of 3 or more Ohms.
Still, once it's dialed in, it should be good for a long time. Or at least I'm hopeful it doesn't drift.
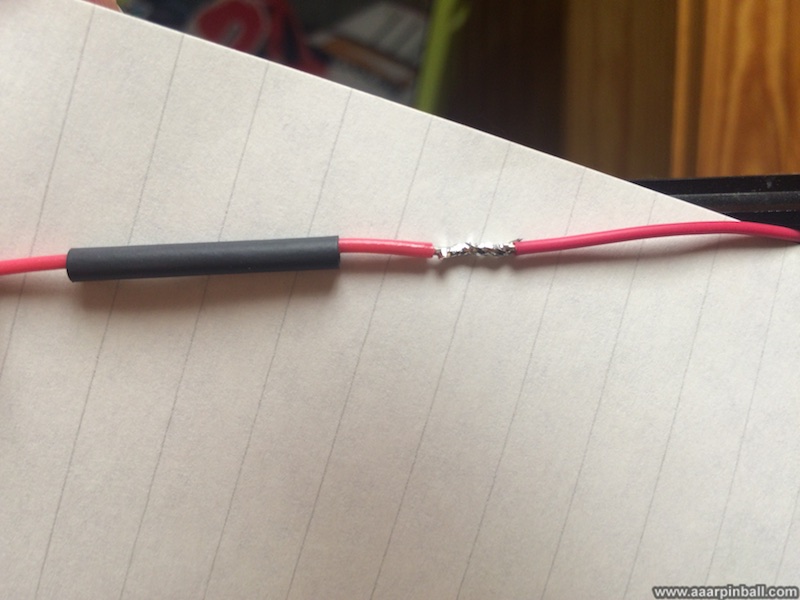
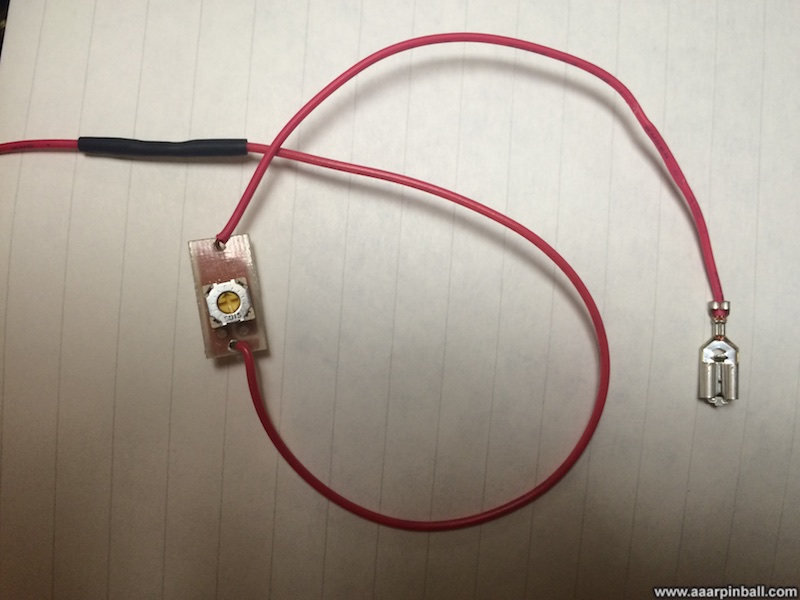
I installed 3 of these potentiometers using the same approach for each. I cut the red wire going to a speaker at an appropriate place. The appropriate place is determined by looking at the wire, where the potentiometer can be placed, and other obstructions. I then soldered the wire coming from the speaker to the potentiometer. Having already located a good place to mount the potentiometer, I cut a separate piece of red wire to size which acts as an extension. This is needed because the location I picked for the potentiometer wasn't in-line with the original wire location. I soldered this extension wire to the potentiometer and then spliced and soldered the extension wire back to the original wire. To make this modification clean looking, I used heat shrink tubing over the splice and mounted the potentiometer with double stick tape.
The first picture below shows the spliced wire with loose heat shrink tubing. Don't forget to add the heat shrink tubing before you connect and solder the wires! You cannot put it on afterwards. Once connected, slide the tubing so it is centered over the splice and use a heat gun (or hair dryer) to cause it to shrink. The second picture shows the spliced wire connected to the potentiometer which is connected to the wire that connects to the speaker (via a spade). Finally, the 3rd picture shows everything connected. This was for the top right speaker, but the other two speakers were similar.

Cabinet Modification to always Capture Drained Balls
Original 8/9/2015 Updated 8/16/2015
I had a little problem with my Rocky and its cabinet. Keep in mind that pachinko machines don't come with cabinets. The machine itself has the decorative front and wooden supports on the top/bottom/left/right. A pachinko parlor will insert the machine into their cabinet system, only exposing the front. When pachinko machines are used outside of parlors, they are usually placed into some sort of custom cabinet. My Rocky pachinko came with a cabinet when I purchased it.
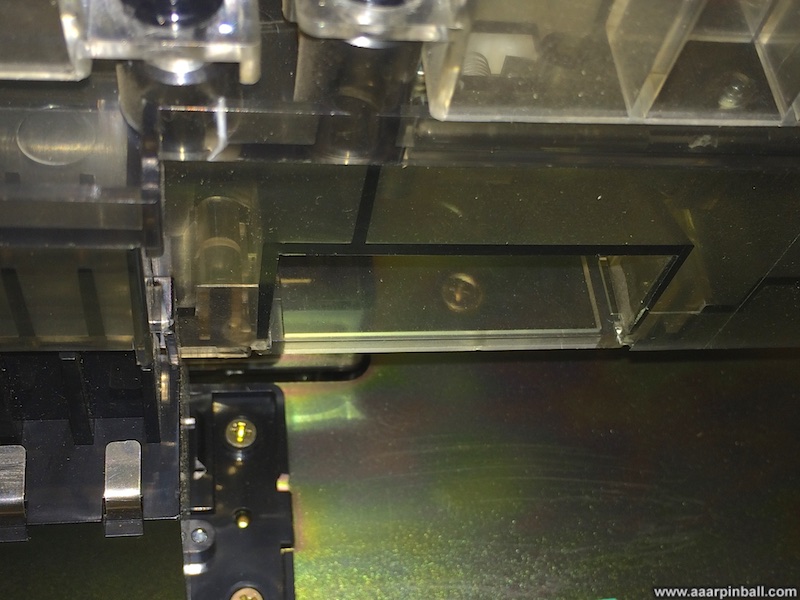
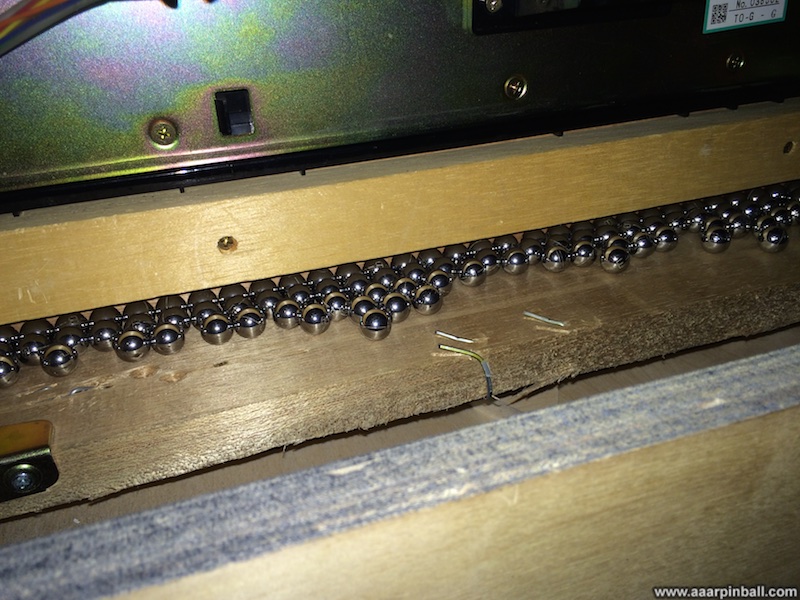
Because of the location of Rocky's drain and the way the cabinet was made, half the balls made it to the appropriate basket but the other half got stuck. When everything works, the balls should miss the bottom of the pachinko and fall into an area that funnels the balls into a basket. However, some of the balls would end up on Rocky's bottom support.
The drain is shown below followed by an image of the balls being stuck.
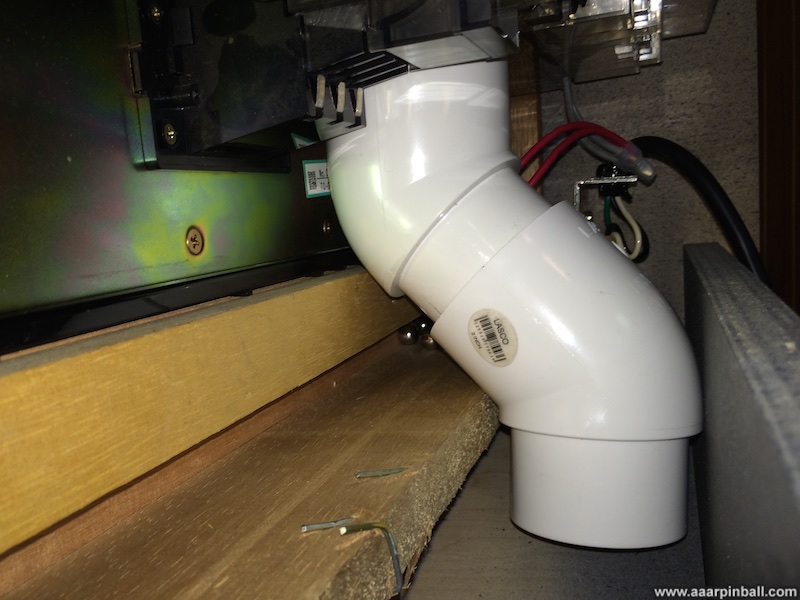
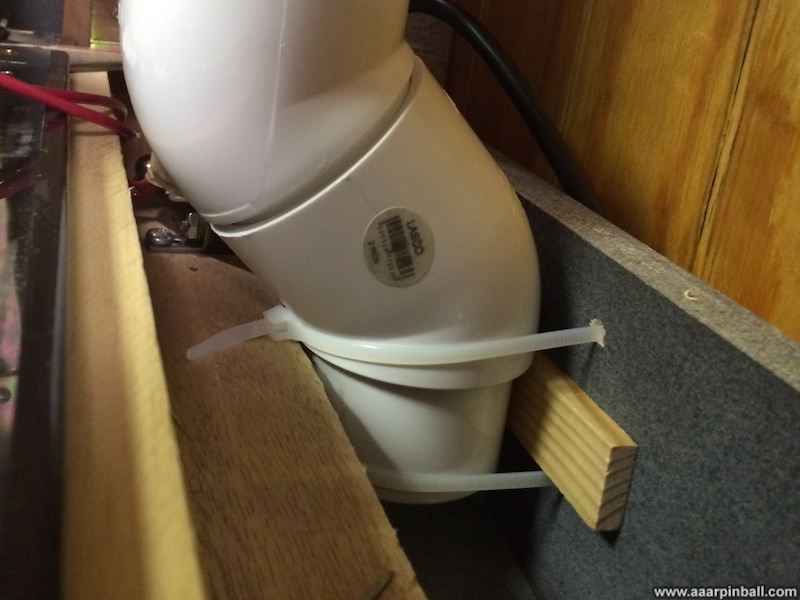
I wanted a solution that only involved the cabinet, not the Rocky pachinko. My understanding is that when a pachinko game is in a pachinko parlor, the parlor would have a ball reclaiming system that captures the balls coming from the drain. Since a real parlor didn't need to modify the pachinko, I didn't want to modify it either. I ended up making a simple diverter out of 2" PVC and attaching it to the cabinet (not the Rocky pachinko). It sits about 1/8" below Rocky's drain and diverts the balls past Rocky's bottom support structure. Since it is not attached to the pachinko, Rocky's access door can be opened and closed without obstruction. The total cost was less than $5.
The PVC diverter is shown below.

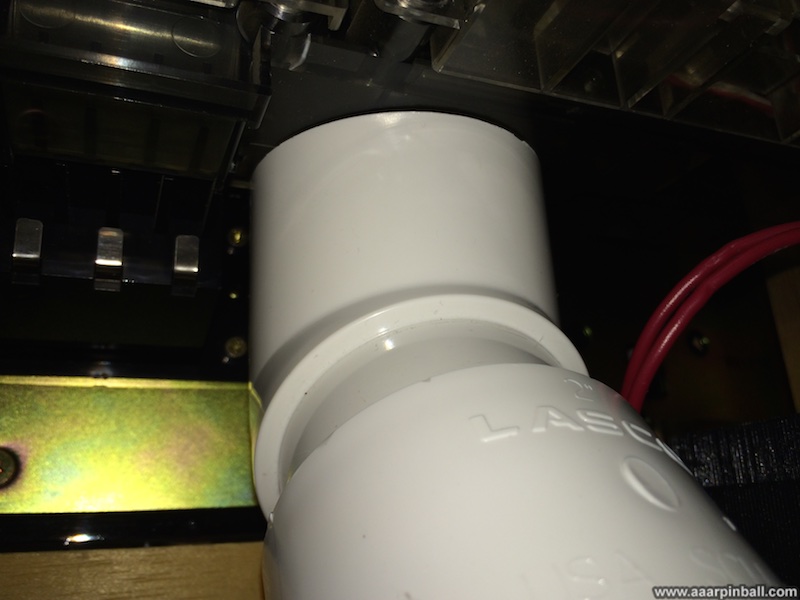
Below is what it looked like when I was working on getting the appropriate positioning and spacing. While it's hard to tell from the picture, there is a good 1" of space between the bottom of the diverter and the bottom of the cabinet.
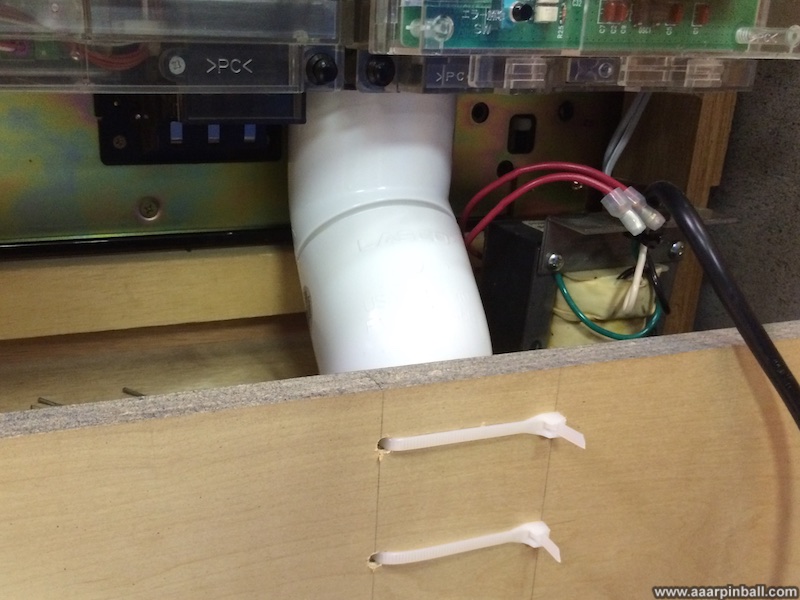
I decided to attach the diverter to the cabinet with with 2 zip ties as shown below. It's not rock solid, but it's stable enough to work.
The picture below shows the diverter up against Rocky's drain, effectively covering the drain that was pictured earlier. It's hard to see in this picture, but there is enough space between the diverter and Rocky's drain to allow the mechanism to swing out when the door is opened.
I've played a lot and it's working great. No more balls stuck in the back.
Small update as of 8/16/2015. I placed a small shim between the cabinet's back wall and the pipe. This made it much more stable.
1500 Pachinko Balls!
Original 8/10/2015
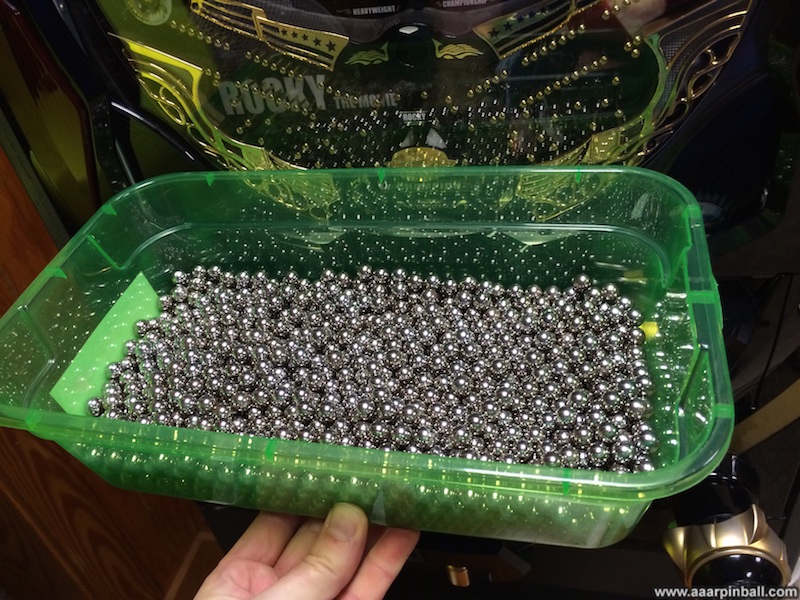
My Rocky pachinko came with, I'm guessing, around 200 balls. I read that any Pachinko machine needs at least 1500 to make it through the basic Fever rounds, so I ordered 1500 from eBay.
My friends on Pachitalk told me that a pachinko ball weights 5.5 grams. From that we can say the 1,500 balls should weight 8.25 kg (or 18.18 lbs). I didn't want to count all the balls I received to determine if I got about 1500, so I weighted them. The weight was over 19 lbs. so I may have gotten a few more than 1500.
Improving the Cabinet Hopper and supporting 1,500 pachinko balls
Original 8/16/2015
The cabinet that came with my Rocky had a ball reload hopper on the center top. This never worked well because the hole from the cabinet to Rocky's hopper was partially blocked by the pachinko's top support beam. This hole simply wasn't in the right place. Some balls would fall onto this support piece and roll out of the front of the cabinet.
A second problem was that there was at least a 3" drop from the cabinet hole and the top of Rocky's hopper. Once I got 1500 balls, it was easy to overfill Rocky's hopper. The balls would start falling out the back of the cabinet.
It looked like there was a fairly simple solution involving 2 steps. First, relocate the hole on the top to avoid the support beam (and relocate the cabinet hopper). Second, use some pipe and extend the hole down toward Rocky's hopper. I believed that if the pipe ended just above the hopper, the balls wouldn't fall out and, rather, would accumulate in the cabinet hopper until space was available in Rocky's hopper.
Below is the relocated hopper on the cabinet. It was originally centered, but per above that wasn't a good location. Now it is located to the right and the back (from this viewing position).
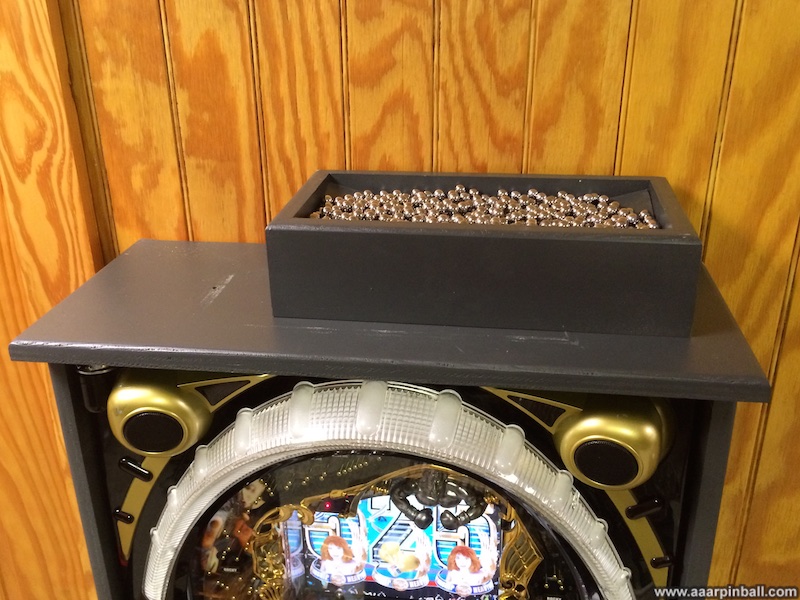
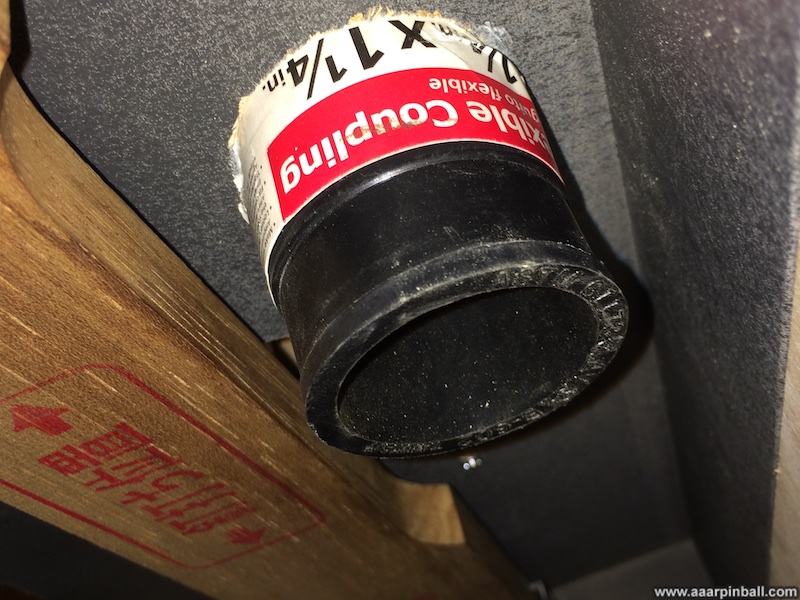
I found a 3" long semi-hard rubber coupler that was the perfect size to extend the cabinet hopper down toward Rocky's hopper. This couple was 2" wide (outer diameter), so that was the hole size I drilled when relocating the cabinet hopper.
With this setup I'm able to put close to 1500 balls into the hopper and play through a fever round without running out of balls!
Toyotec's Rocky Pachinko Information
Original 8/5/2015
Toyotec doesn't have any information about Rocky pachinko on their web site anymore. This isn't too surprising as the game is around 10 years old. I suspected that back around 2005 or 2006 the Toyotec web site would have contained information. Using archive.org I was able to find a flash file for Rocky! I've made screen captures of the information displayed and show them below.
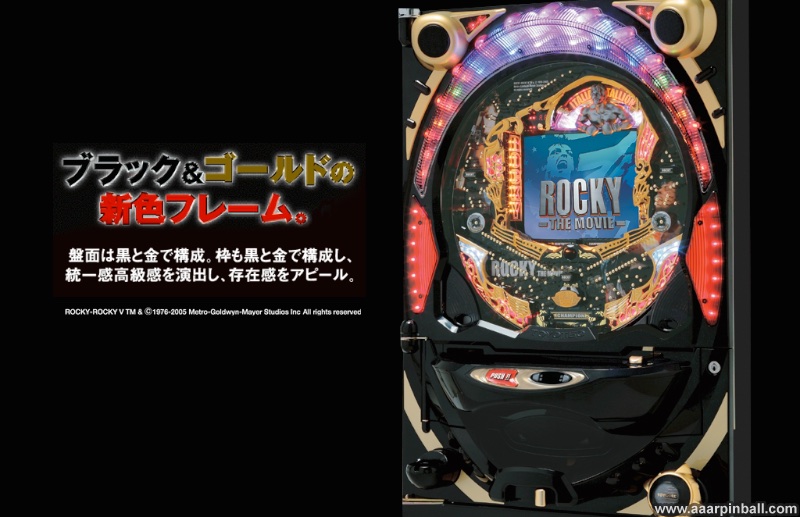
Main Section
Section 2


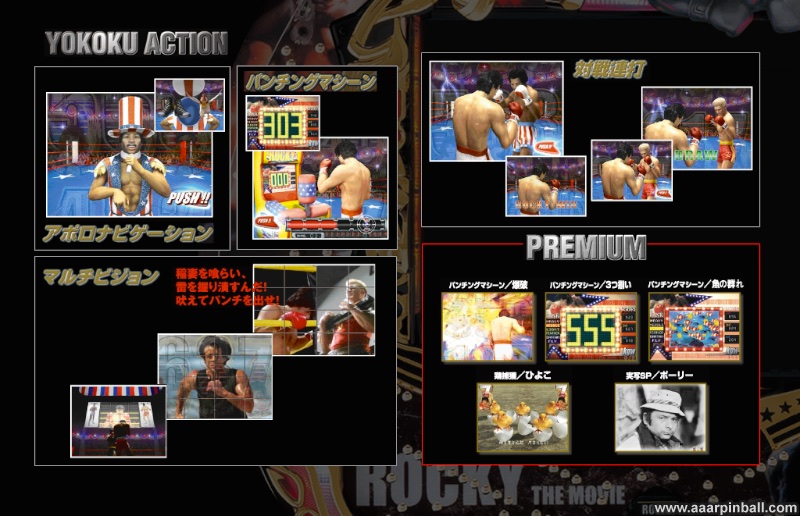
Section 3 Yokoku Action
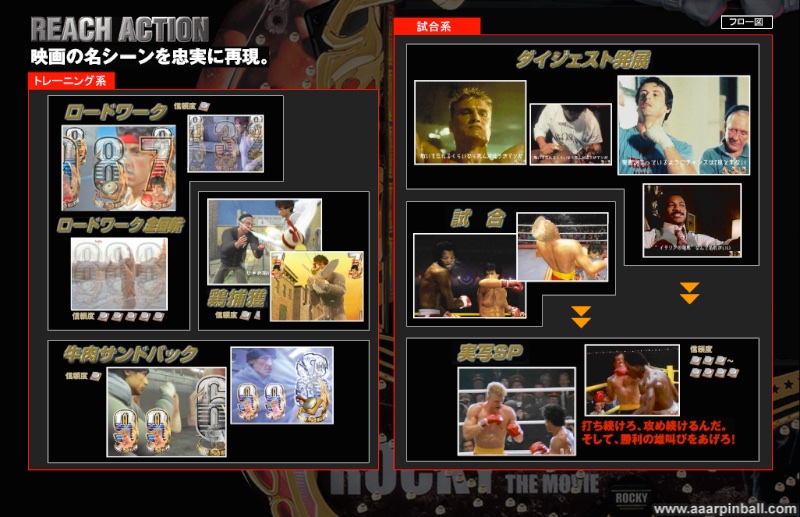
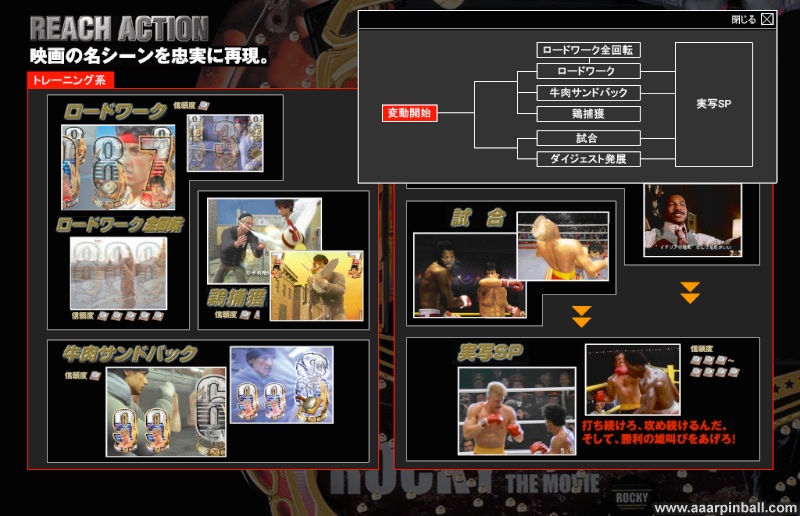
Section 4 Reach Action
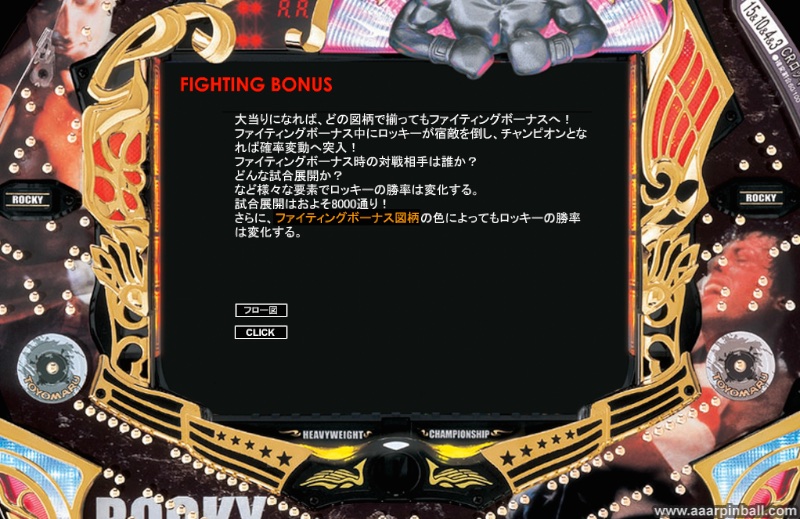
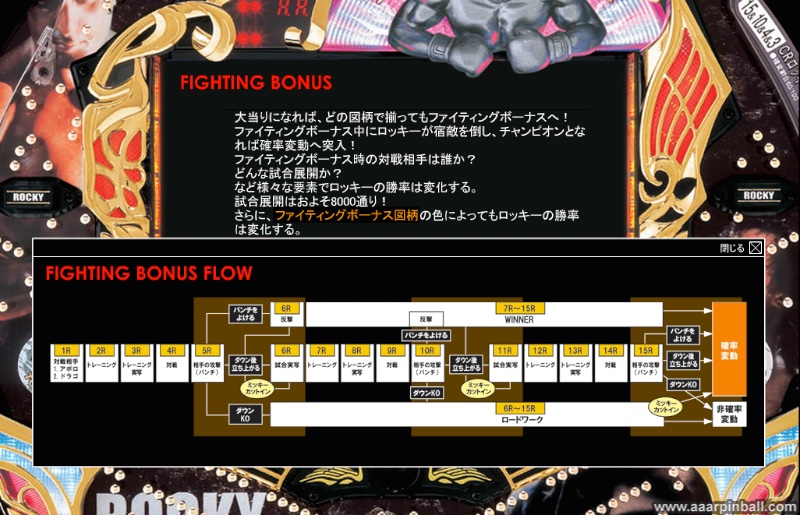
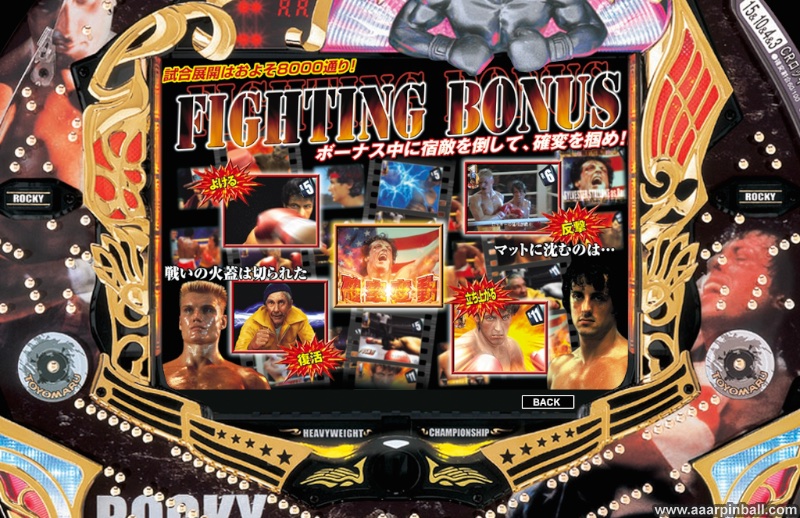
Section 5 Flighting Bonus
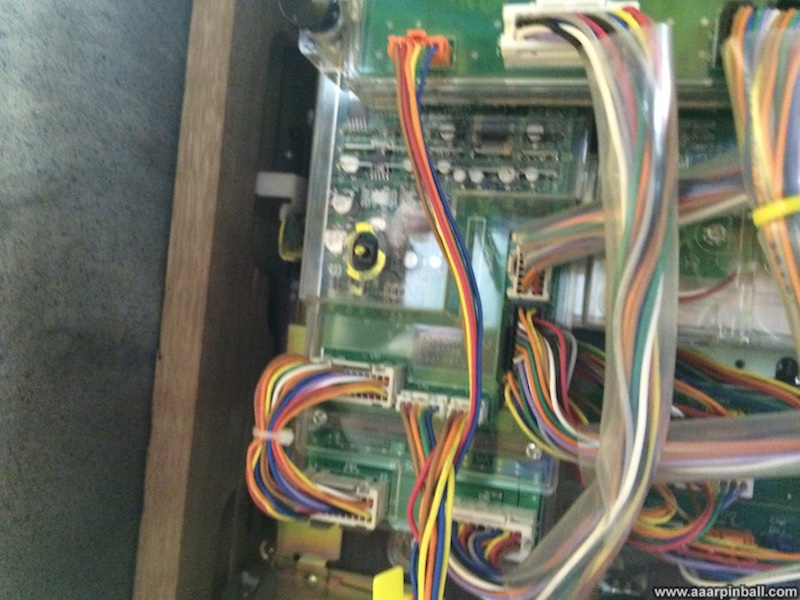
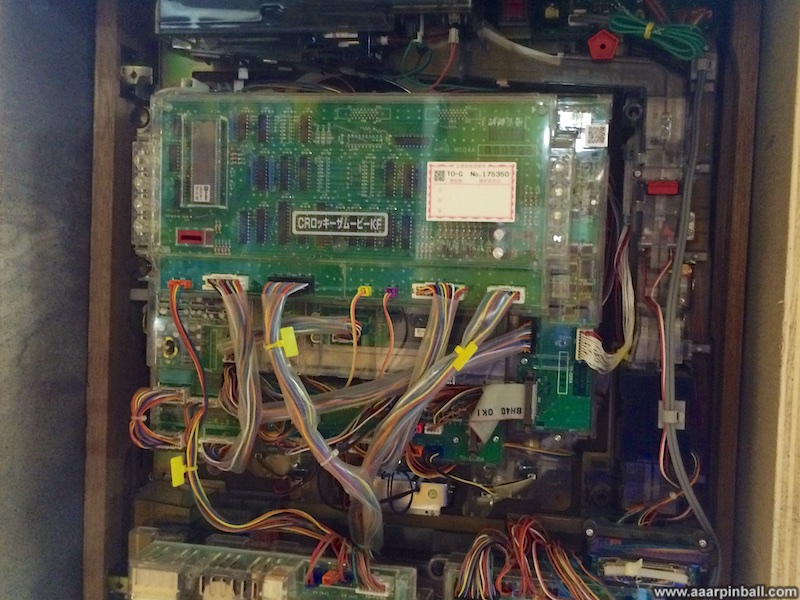
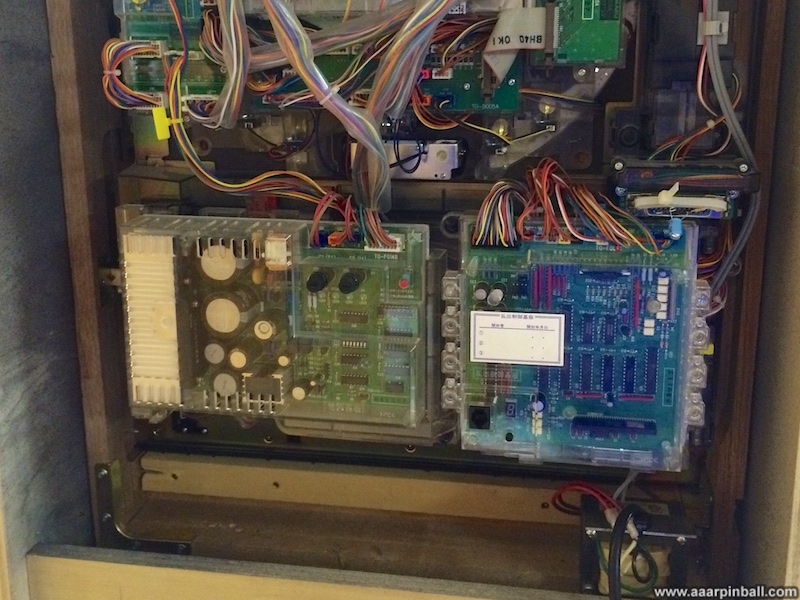
What's on the back of Rocky pachinko?
Original 8/3/2015
Miscellaneous Pictures
Original 8/1/2015
Pictures